Project Initiation
General System & Permissions
Release Notes
January 2026
May 2025
September 2024
June 2024
January 2024
December 2023
September 2023
August 2023
July 2023
June 2023
May 2023
Supplier Management How-To Guides
Supplier Admin & Information Management
Data Governance Dashboard
Supplier Creation
Onboarding Management Plans
Completing Activities
Assigning Classifications to a Supplier record
Issuing an External Assessment
Supplier Status
Supplier Onboarding Dashboard
Assigning Contacts & Stakeholders
Uploading Documents to a Supplier record
Suppliers Dashboard
Supplier Compliance Management
Assigning Insurances and Certifications
Insurances & Certifications Dashboard
Team Governance Dashboard
Assessment Summary Dashboard
Supplier Risk & Issue Management
Issuing a Risk Assessment
Risk Assessments Dashboard
Creating a Supplier Risk
Managing a Supplier Risk
Creating a Supplier Issue
Managing a Supplier Issue
Supplier Risk Management Dashboard
Supplier Relationship & Performance Management
Contract Management How-To Guides
Contract Admin & Information Management
Contract Creation
Assigning Classification(s) against a Contract record
Contract Health Drivers & Checklist Completion
Contract Setup Dashboard
Uploading Documents to a Contract record
Contracts Dashboard
Foreign Currency
Contract Milestone & Key Date Management
Contract Renewals Management
Sourcing Management How-To Guides
Creation and Planning
Sourcing Activity Creation
Planning Tab
If you are Planning with Quick Quotes
If you are Planning with Opportunities Hub
Completing the Planning Phase
At Market
If you are At Market with an external tool
If you are At Market with Quick Quotes
If you are At Market with Opportunities Hub
Completing the At Market Phase
Evaluation
Outcome
Procurement Act 2023
Procurement Act Introduction and Navigation
Transforming Public Procurement
Source- to-Contract and the Procurement Act
Source-to-Contract Procurement Act Prerequisites
Navigating Procurement Act Features Within Source-to-Contract
Overview of Procurement Act Notices
Procurement Act Deep Dive
Bolt Ons
Additional Help
Knowledge Deep Dive
Process Templates (Contracts)
Process - For System Users
Contract Stage Progression Process
Requesting Stage Approval
Approving Stage Approval Requests
Variation Process
Requesting Variation Approval
Approving Variation Approval Requests
Contract Process Comparison
Configuration - For System Administrators
Supplier Categories
Management Plans
Artefact Groups
Activities
Triggers and Schedules
Supplier Data Requests
Delegation of Authority - Configuration
Delegation of Authority - Process
Terminology & Configuration Guides
Frequently Asked Questions
Where can I find information on the Procurement Act features?
Why can't I apply a variation against my contract?
How do I filter within Analytics?
I cannot access certain areas of the system, why?
How do I switch email alerts on?
How do I 'Finalise' my contract?
How long does it take for Analytics to update?
What file types can I upload?
The OneAdvanced Customer Support Portal
Admin: How can I assign a User the 'Contract Manager' role on the Customer Support Portal?
How to raise a Support case?
Admin: How can I remove a User from the Customer Support Portal?
Customer Portal Guide
Admin: How can I grant Admin permissions to a User on the Customer Support Portal?
Admin: How can I find my organisation's Registration Code?
How do I access the OneAdvanced Customer Support Portal?
Admin: How do I approve a new User on the Customer Support Portal?
How can I raise a finance case with OneAdvanced?
- All categories
- Additional Help
- Knowledge Deep Dive
- Delegation of Authority - Configuration
Delegation of Authority - Configuration

To configure Delegation of Authority or Delegated Financial Authority within your Source-to-Contract system, there are four steps to complete in your configuration module.
- Define Roles
- Create Matrices
- Flag Action as a Financial Action
- Create a Dynamic Step in an Action template
Once you have completed these actions, you can navigate to the Process article to see how to use this functionality within your system.
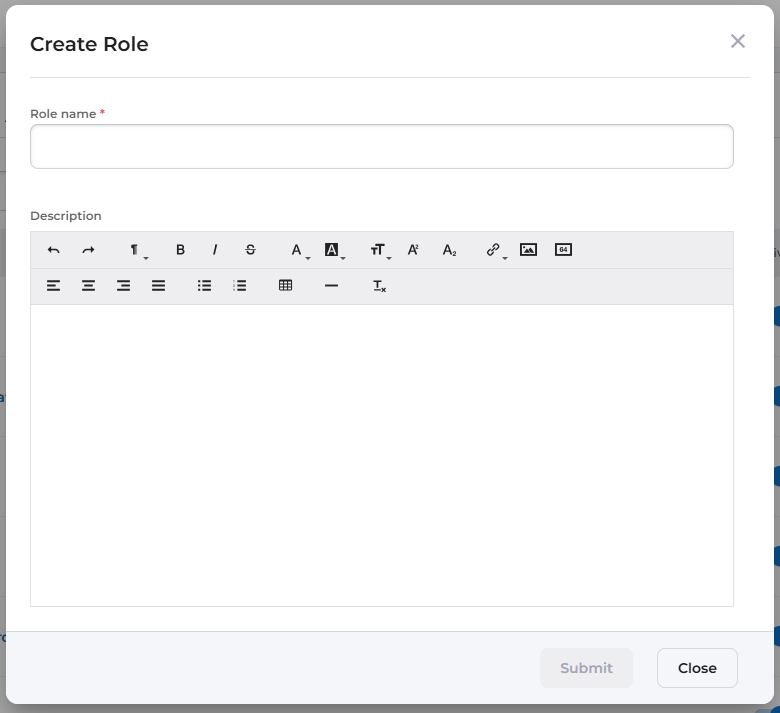
Defining Roles
Navigate to the Delegate Actions section of the Configuration module and select the Roles tab.
Select the + Role button, enter a name for the new role (Adding a description is an available option but is not mandatory) and select submit.
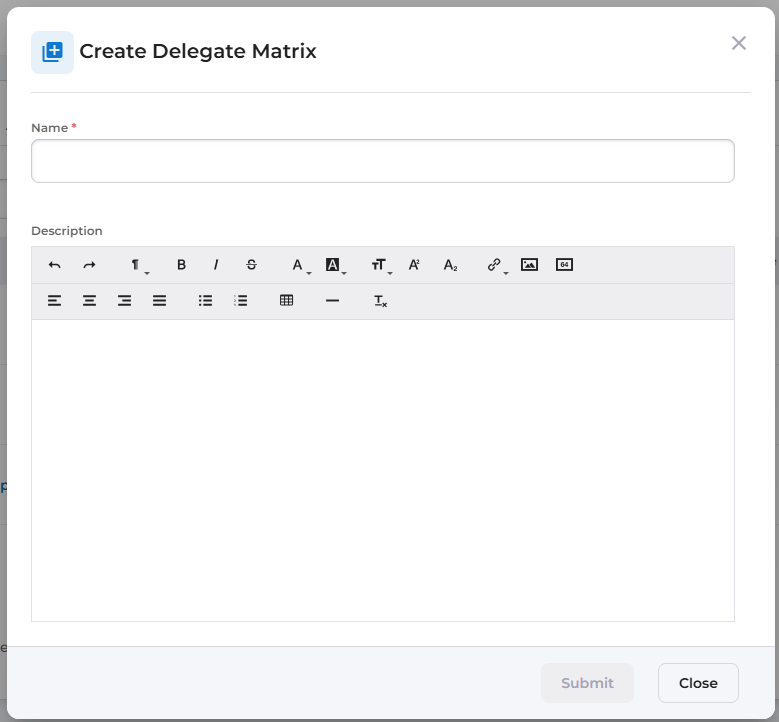
Creating a Matrix
Navigate to the Delegate Actions section of the Configuration module and select the Matrices tab.
Select the + Matrix button, enter a name for the new matrix and select submit. Adding a description is an available option but is not mandatory.
Select the Matrix you have created and scroll to the DoA Matrix Level section. This is where you will define the financial range that requires an action and the role from which that action can be assigned.

Select the + Add Level button to begin defining your matrix. You will be presented with the following wizard:
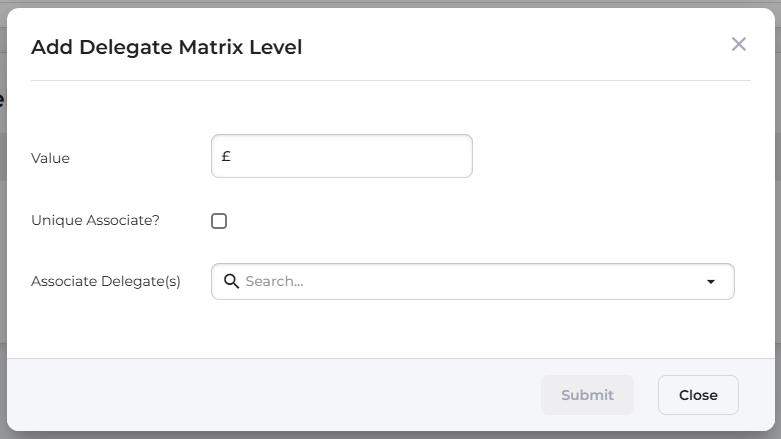
When defining your matrix, each level must consist of
- A value
- This is the upper limit of the ex-tax value for which the associated role can approve requests. The lower bound is set by the previous level's value (The lower bound will be set at 0 for the first level). As the levels go up the value has to increase.
- For the level with the maximum value approver (i.e., CEO, CFO etc - a level that should be approved by any value above the previous level), it is currently best practice to use an extremely large number as the value/upper bound.
- Whether the role is a Unique Associate
- This restricts the level to only having one associated role.
- Associate Delegate(s)/Associated roles
- These are the delegate roles that have the authority to approve DoA requests of the level.
- Multiple roles can be selected for the same level
In the above image, the CFO has been listed as a unique associate
Associating the Matrix with a corresponding Action Type
Navigate to the Action Types tab within the Delegate Actions section.
Select the + Action type button and enter a name and a pending response status for the new action type.
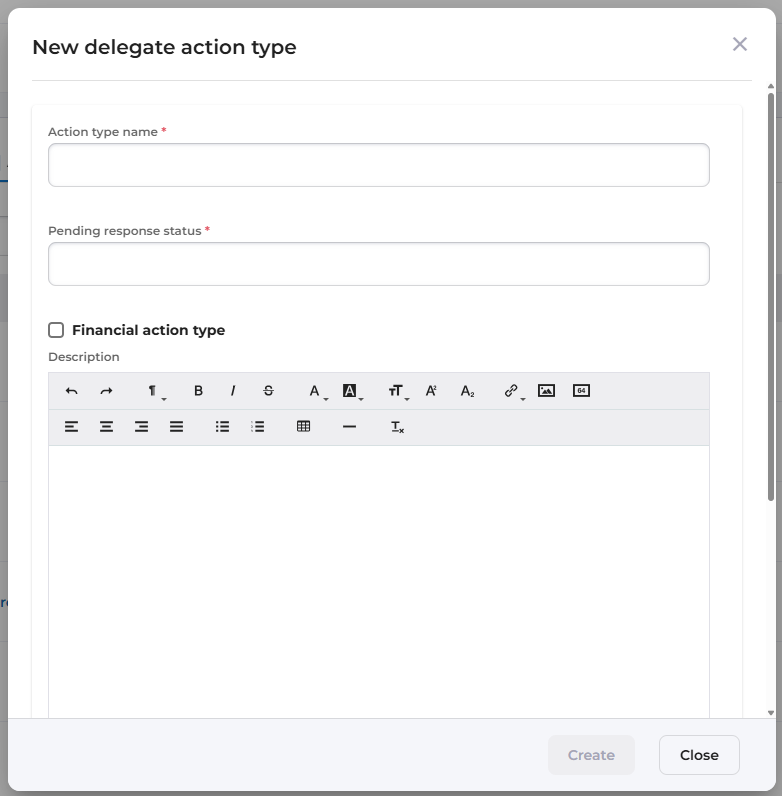
Tick the Financial action type box as this indicates we want to utilise a DoA/DFA matrix.
This will cause two options to appear: "Highest required delegate" or "All delegates up to the highest appropriate".
Select the relevant option for your requirements to decide whether high-level decisions should be approved only by a role in the corresponding level, or by every role within the lower levels as well.
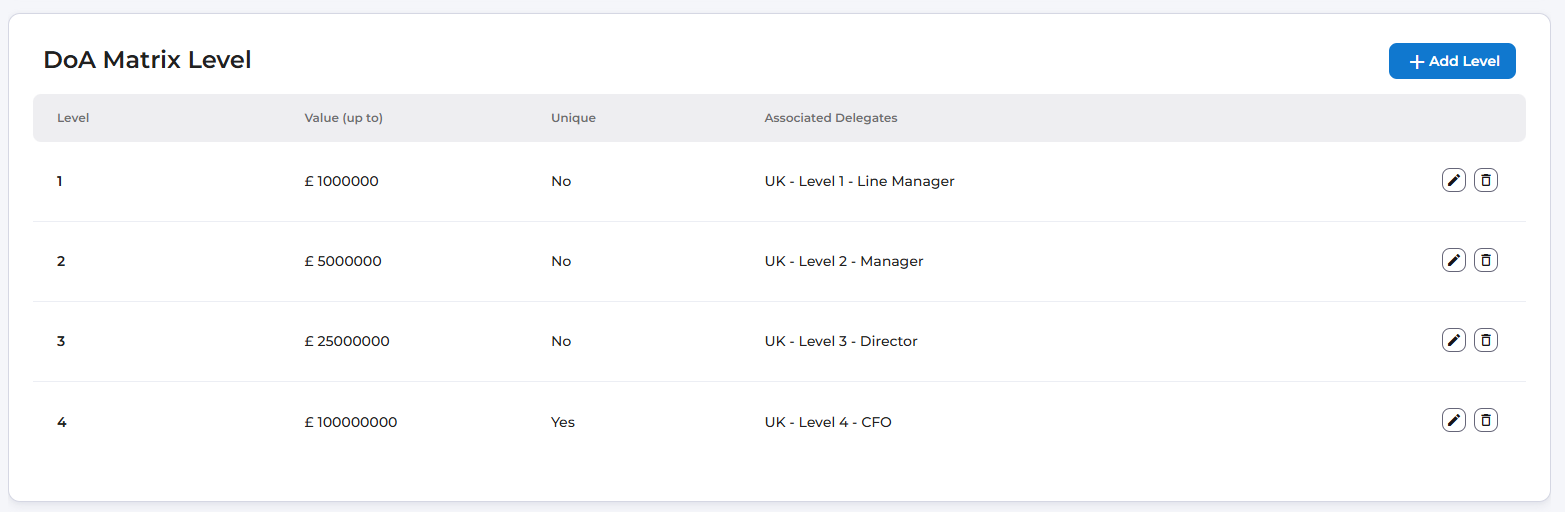
For example, using the matrix levels in the image above, if the record value was £7,500,000:
- "Highest required delegate" would require only the "UK - Level 2 - Manager" to approve the action request.
- "All delegates up to the highest appropriate" would require both the "UK - Level 1 - Line Manager" and the "UK - Level 2 - Manager" to approve the action request.
Next, fill out the appropriate response options at the bottom of the wizard and select create.
Associating the Action Type with a template
Now that the action type has been configured, we need to create an action template that can be used within a process template.
Navigate to the Templates tab within the Delegate Actions section and select the + Template button.
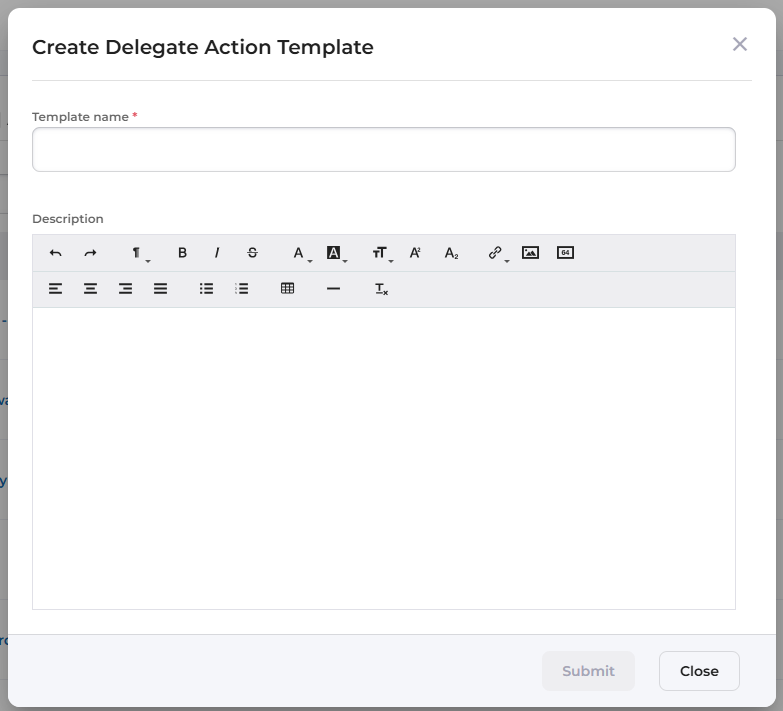
Enter the template name and select submit.
Select into the template that has been created, scroll to the Action Steps Setup section and select + Add Step.
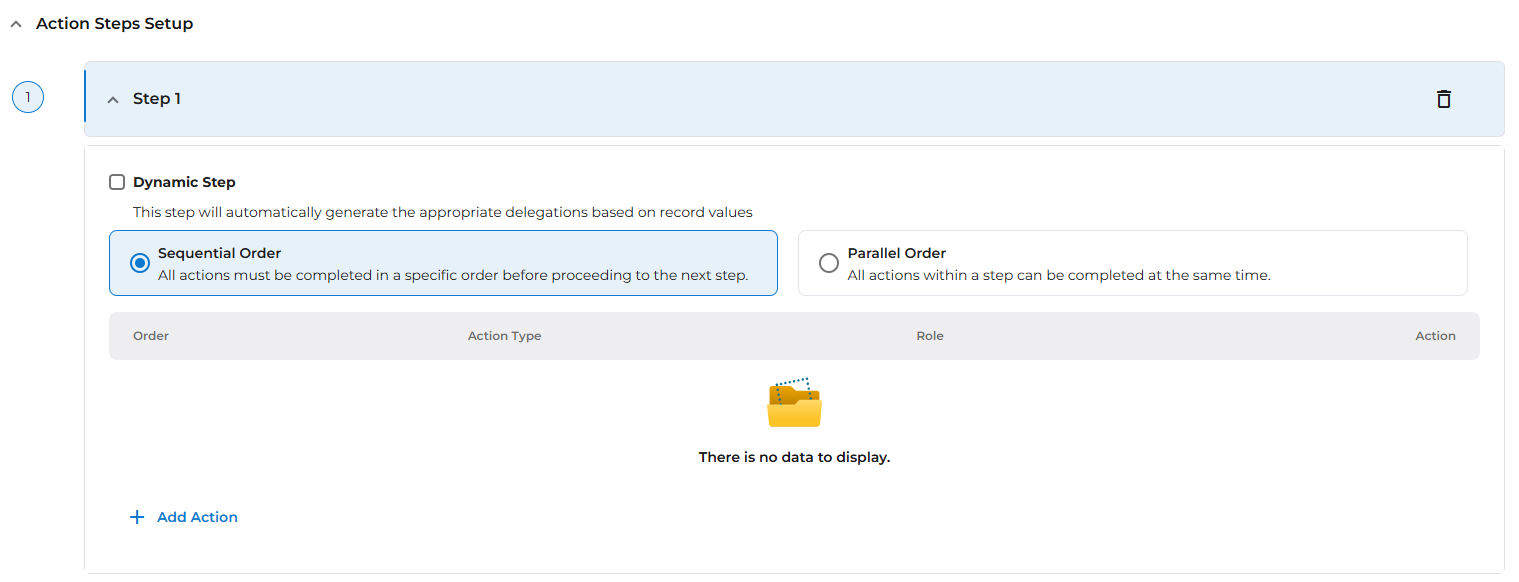
For each step you can add actions.
You can either add this as usual by following the standard process for delegate actions, or you can identify this step as a dynamic step using the checkbox. If you choose the latter, the actions required for that step will be determined by the DoA matrix you've just configured.
When the Dynamic Step checkbox has been selected, the view will change to
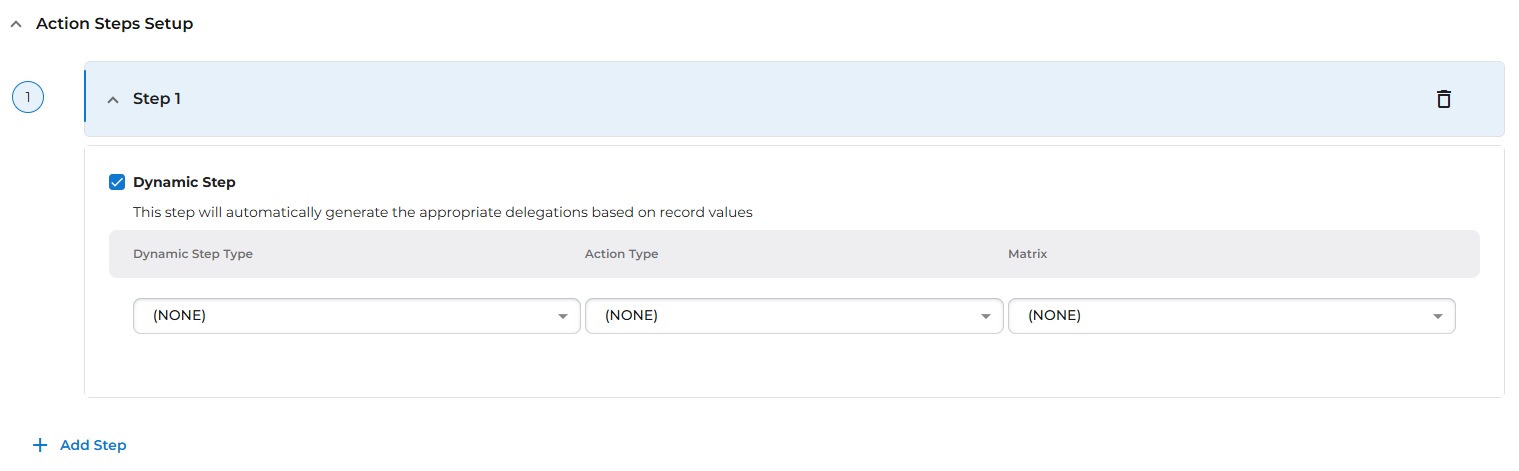
This enables the user to select the action they want to use and the matrix that should be employed to determine the required user(s) from the dropdowns shown.
To complete the configuration of each Dynamic step, users must:
- Select the type of step - Currently there is only the option of "Delegation of Authority - Financial".
- Select the Action - The only options that are shown here will be Actions that have been flagged as 'Financial Action types'.
- Select the associated Matrix to determine roles - This allows an organisation to have multiple DFA matrices and apply them to different process templates and also potentially have multiple matrices within one process template.
Once you have completed your template, select Save. This action can now be included in process templates in your site.